최종 업데이트: September 2026
교토 잣나두 -the Blooming Phantom- Xanadu 미궁 맵 가이드
Xanadu labyrinth floor 구조, 2D 탐험·3D gate, Aether statue, Guardian 시련, Uncertain Domains 위치 가이드.
Xanadu 구조 개요
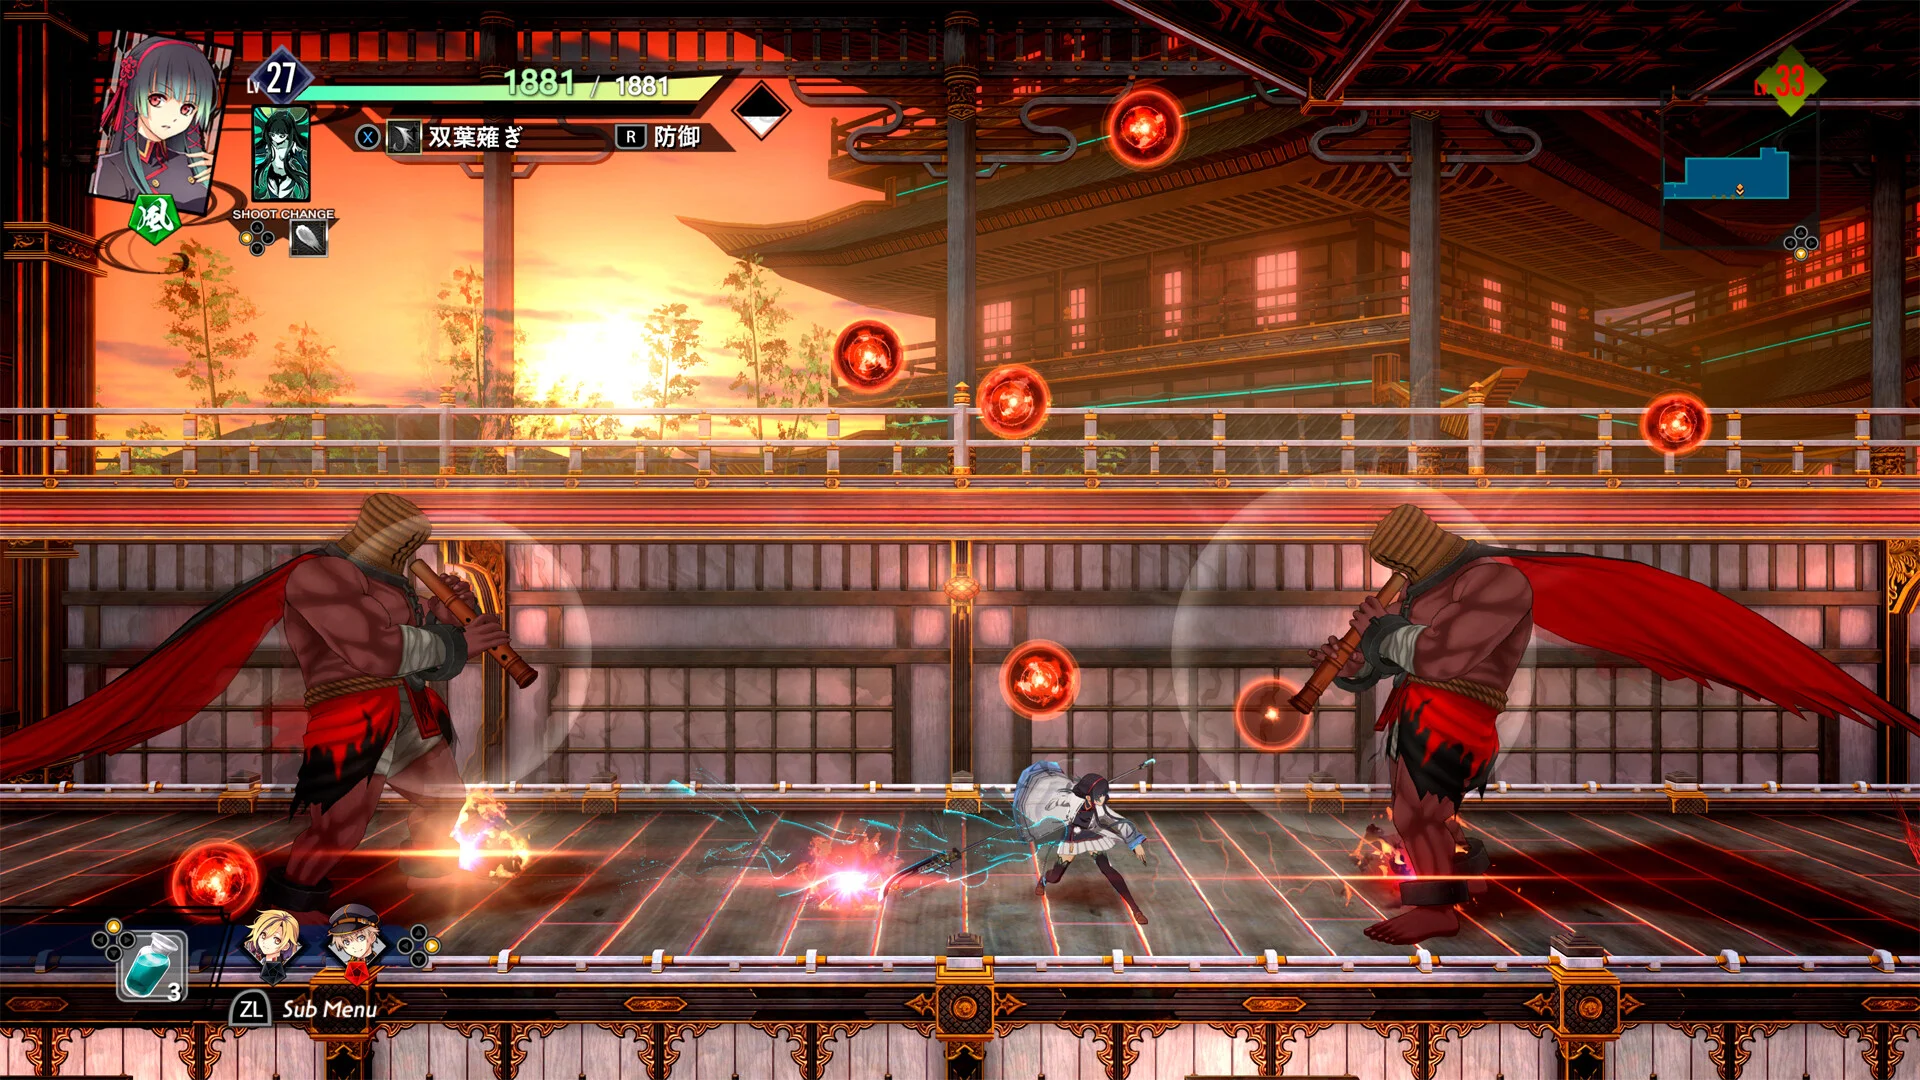
Xanadu는 히라사카 학원(Hirasaka Academy) 지하에 펼쳐진 이계 미궁으로, 교토 잣나두 -the Blooming Phantom-의 핵심 dungeon hub입니다. 학원 입구에서 dive하면 2D side-scrolling exploration zone으로 진입하고, gate point에서 3D arena combat으로 전환되는 Dual Dimensional 구조가 층마다 반복됩니다. 각 floor는 theme attribute(fire, ice, wind, light 등)와 Guardian affinity puzzle을 가지며, map preview screen에서 다음 gate 연속 여부를 확인할 수 있습니다.
미궁 progress는 story chapter와 Facility Requests objective에 동시에 반영됩니다. Research Building의 destructible object target, Training Ground subjugation quota, Chapel rescue destination이 map marker로 overlay되므로, single dive에서 multiple request completion을 목표로 route planning이 필수입니다.
2D 탐험 구간
2D corridor에서는 platforming, wall kick, double jump, destructible terrain이 핵심입니다. Aether crystal과 crafting material drop은 environmental break object와 enemy drop 양쪽에서 나옵니다. Spirit Bullet은 analog stick angle aim이므로 elevated flying enemy 처리 전 diagonal pre-aim habit을 들이세요.
Mini-boss checkpoint는 3D full transition 없이 camera scroll lock으로 soft gear check 역할을 합니다. Guardian attribute environmental hazard — 불바닥, 얼음 미끄럼, 돌풍 corridor — 는 appropriate Guardian Cards 또는 Soul Device counter unlock 전까지 progress gate가 됩니다. shortcut은 knockback recovery와 wall kick unlock 후 retroactive access 가능한 경우가 많습니다.
3D Gate & Guardian 시련
Gate 진입 시 camera가 arena view로 전환되며, reticle aim Spirit Bullet과 Secret Arts가 unlock됩니다. 3D segment type: multi-enemy wave, Guardian trial, story boss. objective complete 시 자동 exit. same dive 내 back-to-back 3D gate에서는 Secret Arts Gauge carry — hub return 시 reset.
Guardian trial floor는 map icon으로 distinguished됩니다. trial clear reward로 Guardian Cards slot unlock, enchant material, cursed armor chest key가 drop됩니다. boss gate 직전 small wave clear로 gauge prep는 speedrun과 first-clear stability 모두에 유효한 advanced tactic입니다.
Aether & Statue Route
Aether statue는 floor corner와 hidden vertical path에 배치됩니다. vial overfill 시 Aether Poisoning — Soul Accel block, heal item block, HP drain — 이 발동하므로 Sacred Tree offering 주기와 dive goal을 balance하세요. statue route와 Wyatt material destructible overlap을 map memo에 표시하면 farm efficiency가 크게 오릅니다.
Cursed armor chest는 specific floor depth와 Guardian trial clear 조건이 linked됩니다. chest loot는 Kijaku Tenjinguu on Shijo Street에서 Dispel Talisman으로 purification 필요 — dive inventory management에 empty slot을 확보하세요.
Uncertain Domains
Uncertain Domains는 unstable subzone으로 map hazard icon으로 표시됩니다. Chapel rescue mission destination이며, platforming difficulty와 timer escort segment가 포함됩니다. Marina Yuino·Luana Calderone bonding level에 따라 time limit extension bonus가 적용됩니다.
wall kick·double jump 미해금 상태로 진입하면 soft-lock risk — Training Ground Valor farm 후 mobility node 우선. fail 시 request reset, penalty는 lost dive time뿐이므로 retry friendly하지만, same day other Facility deadline과 schedule conflict 주의.
- 2D — platforming, stick-angle Spirit Bullet, destructible farm
- 3D gate — wave, Guardian trial, boss; gauge carry rules
- Aether statue — vial management, Sacred Tree offering rhythm
- Cursed chest — purification at Kijaku Tenjinguu
- Uncertain Domains — Chapel rescue, timer escort